
Sorry this guide is so delayed. I am passionate about eye make up and I wanted to get it right. Good eye make up will change your life! And it's really not difficult if you know what you're doing so let's get started. I'm going to split this up into two sections, with two looks for daytime in this one and two sexy evening looks in the next.
A quick note on colors and skin tone before we start:
Porcelain skin tone with blue, green or hazel eyes needs neutral pastel eye shades. Grey is an amazing color for day, also lavender and loads of different greens will compliment your coloring, minimise redness and enhance your natural pale and interesting assets. Use darker shades after dark. One of the most striking looks is that of the English rose. The beautiful vulnerability of near translucent skin and light eyes means that you can rock red lips with liquid lined eyes while still looking wide eyed and classic. Just follow a couple of simple rules and you're all set!
If you have
fair skin but darker than porcelain and maybe with a darker hair colour, you can wear bolder tones of shadow and liner on your eyes. Try out different shades of blue, brown, beige, olive and gold. For daytime looks especially you are the ethereal natural angel in olive green over natural stone colors.
Light olive skin with dark eyes and hair need rich, warm but neutral colors. Tones of brown, beige and grey are fantastic for day and night but if you want more va-va-voom for evening you can also take jewel colors (see upcoming Eye Make Up Tutorial - Part 2 for night looks with impact).
Dark olive is sallow, yellowy skin with dark hair and eyes and again you need to experiment with nude beiges, browns, olive green and slate greys. These smooth, polished, flattering tones are far from boring. For night time looks, you Mediterranean beauties can pull off an array of beautiful jewel colours.
Black skin means a free for all as you can take the biggest range of eye make up colors. Jewel tones, deep turquoise, gold, sapphire and plum. Jealous? I am!
I don't know whether the school gates are like shark feeding frenzies world-wide or just in the south of France but I have never in my life appreciated my makeup skills more than now. My armour, my face for the world. Good make up can make you feel better. More together, more professional, more feminine, more sexy, more outspoken... And with my most natural war paint on, I can conquer the world.
Before we start, please tend to your eye brows. They are so important! You don't have to be the world's best tweezer technician, just keep them tidy and tended and after applying your eye make up, go over them with an eyebrow pencil, brush and powder.
1. Natural Day Eyes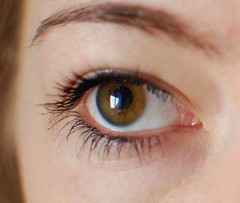
Naturally, our lids are probably pinker than our faces. Use a liquid eye make up base to make sure that any redness is covered and your make up stays put throughout your working day. I recommend the
Benefit Stay don't Stray (also found at
sephora.fr) one - it works for me, is easy to apply and lasts for ever!
Apply base with your fingers (not too thickly as it will crease into wrinkles), then apply a base eye shadow colour to your eye lid and socket. For daytime, choose a neutral colour that suits your skin tone. The next colour has to compliment your base but be darker and accentuary. For me, either a beige and a brown work (dark olive, brown eyes) or a cream and a grey. If you're worried about choosing the right colours, the packs of ready matched eye shadows are fab.
Bourjois is a good brand for this.
Use a wide (full) eye make up brush to apply your base colour and afterward sweep the accentuary colour starting from the outside of your eye and sweeping the sockets. Don't come all the way in, leave the last quarter and make the colour heavier at the outside of the eye. LASH mascara on. Mascara is the most important part of your arsenal and you don't need lash curlers if you have a good one. I have used the same mascara for over 10 years now and it's never been beaten with how good it is compared to other, more expensive models. This is it people... It's the God of all mascaras...
Bourgeois Volume Glamour Ultra Curl. Just use it!
If you feel like you need a bit more oomph, line your top and bottom lids with a grey or brown liner and smudge with a brush.
2. Liquid Eye Liner (day or night)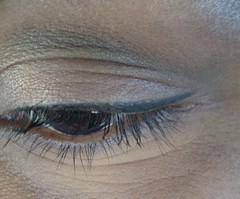
I'm not going into the different names for the shapes of liner. Cat, winged blah blah blah! The truth? The more winged you go, the bigger your eye make up gets right?! But it's ok because we live in the new age of the lined eye. A lot of women are scared of liquid eye liner. I beg you, please don't be! All you need is the correctly shaped applicator and some practice. Your hands could be shaking like a lush on detox and you could still get to grips with it. It's easy! You just need to accept that you'll go wrong! And it'll be ok!
Apply the lightest base you can (for your skin tone) and sweep a light contrasting color onto your sockets from outside your eye to 3/4 in. Now practice, but for heaven's sake, please invest in the right liner. The best bit is that it is the cheapest part of your kit, I kid you not. Rimmel do, without doubt, the best liquid liner
"Rimmel Exaggerate Liquid Eyeliner"
as it has a solid applicator (like a pen) and it lasts all night.
The experts say always start from the inside corner of the lid with liquid liner and I agree, however there's no right or wrong way, so see what works best for you. I start with the inside corner, sweep half way and then I draw a line from outside (the winged part) and bring it back to meet the first line in the middle. Try different shapes and see what you think. If you're wary of going OTT then start with a thin line with a short wing but just so you know, the wing has to be 5mm plus I think to elongate efficiently and to give you the 50s sex kitten look you're after (otherwise why are you reading this?!).
HINT: I started using liquid eye liner in front of a bathroom mirror that I put on my mum's dining table so I could rest my elbow on the table and steady my lining arm with the other one. Now I apply it without a mirror or often, at red traffic lights in the rear view mirror on the school run, proving that all you need is practice.
Don't forget the mascara afterwards and if you'd like a more impact, full look with liquid eye liner, line your lower lid (inside and out) with a kohl pencil in either grey, green, brown or black.
Please be off with you to the bathroom mirror to practice expressing yourself with your eye make up. Liberate yourself! And I'll post two eye make up looks for night-time impact soon!


 Every mother is a working mother, whether they look after their kids 100% of the time, work from an office, or work from home. Everybody has their own situations and reality going on and each is different. I read a post by Scary Mommy the other day that resonated:
  Happy Easter! I love this time of year (sorry if I am making you puke with my positivity!) because I can literally feel the blanket of Winter depression lifting. The sun warms and soothes pale and pasty skin, the winter knits can be stored away and the food markets come alive with the vibrantly coloured fruit and vegetables now in season. It inspired me to cook up a lunch for a girlfriend and I decided it was too good not to share... So here it is!
 Today was going to be a good day. After last night's fabulous girls night and a much needed laugh and one too many glasses of white wine, I woke up to Gentleman Friend telling me that he would do the school run and that I could "take it easy" today - it just doesn't get any better than that! I ran to get some essential supplies from around the house (iPad, cup of tea, toasted hot cross bun and all the TV remote controls) before crawling back into bed to watch trash television and catch up on my social networking when... To my horror... I received an abusive Facebook message from a long since culled ex-friend. Seriously?! I cut her off and haven't seen or spoken to her for over three years and she still hasn't got the message? I don't know why I'm surprised, she isn't very stable. I met her when I was new and friendless in France and desperation attracts... Well, you get the point. No more mud slinging!
Join Gertie's Community